How to Filter by ID in Reports and the Dashboard
In this article
Overview
PayHelm supports filtering by ID across both Reports and the Dashboard. You can filter by Brand ID, Product ID, SKU, Order ID, and more — without needing to know the exact name.
Filtering by Brand ID in Reports
To see brand-level data filtered by a specific Brand ID, create a Product Brands report:
- Click Reports in the top navigation bar.
- Click Create New Report (or open an existing report to edit it).
- Enter a name for the report (e.g., "Brand ID Report").
- Under Source Type, select Products.
- Under Report Type, select Product Brands.
- In the Report Configuration section, the Report Column tab appears — make sure Brand ID is checked as a column.
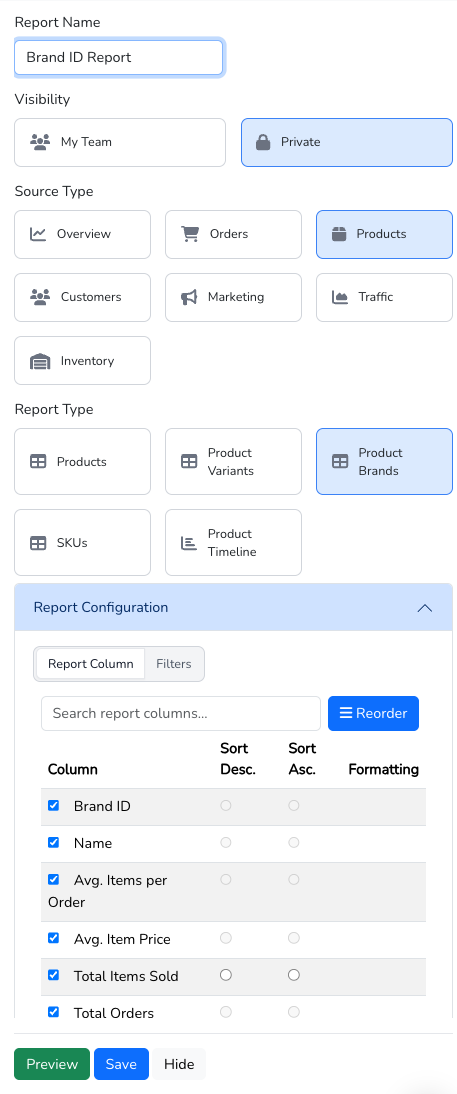
- To filter the report to a specific Brand ID, click the Filters tab (next to Report Column).
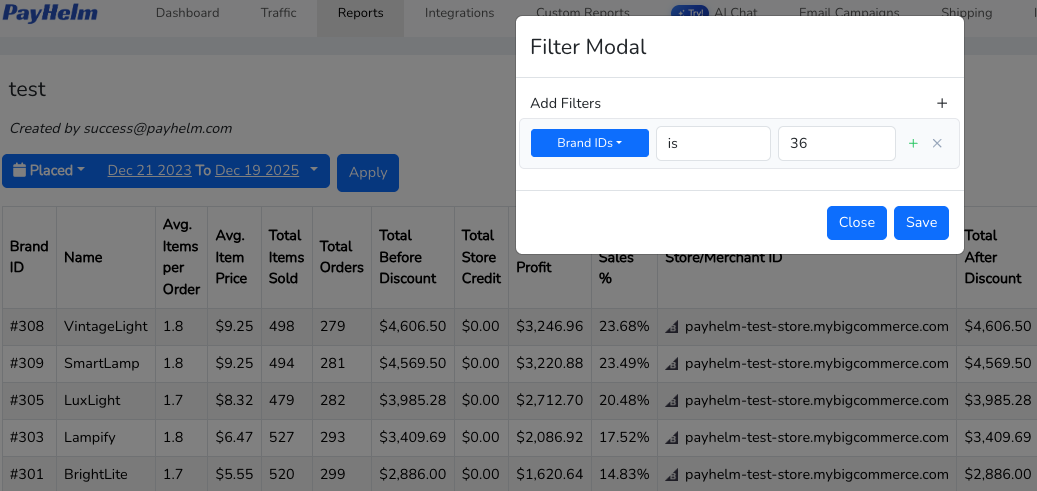
- Click the + button next to Add Filters.
- In the filter row that appears, click the left dropdown and select Brand IDs.
- Set the condition to is, then enter the Brand ID number in the value field.
- Click Save.
Note: The exact Source Type and Report Type will vary depending on what you need. For order-level data, use Orders as the Source Type. For product-level or SKU-level data, use Products with the appropriate Report Type.
Filtering by Brand ID on the Dashboard
- Go to the Dashboard by clicking Dashboard in the top navigation bar.
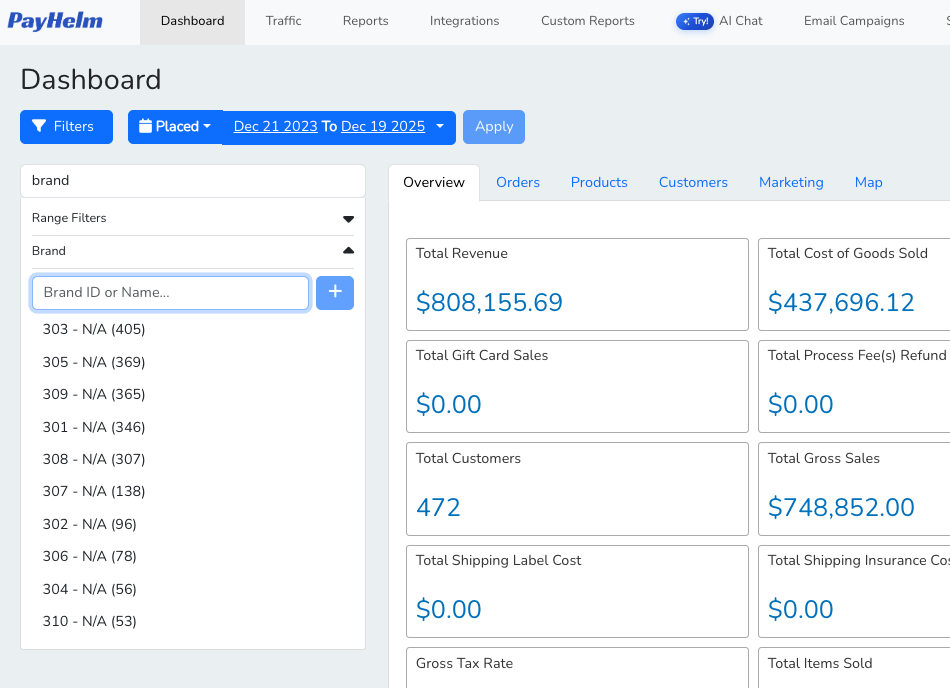
- Click the Filters button at the top left of the page.
- A filter panel opens on the left side of the screen. Type brand in the search box at the top of the panel.
- The Brand section will appear — expand it if it is not already open.
- In the Brand ID or Name field, type the Brand ID number or brand name.
- Click the + button next to the brand in the results list to add it as an active filter.
- Click Apply at the top of the page to update all dashboard metrics.
Enabling Filters via Display Configuration
If a filter type (such as Brand) is not appearing in your Filters panel, it may need to be enabled first in the Display Configuration.
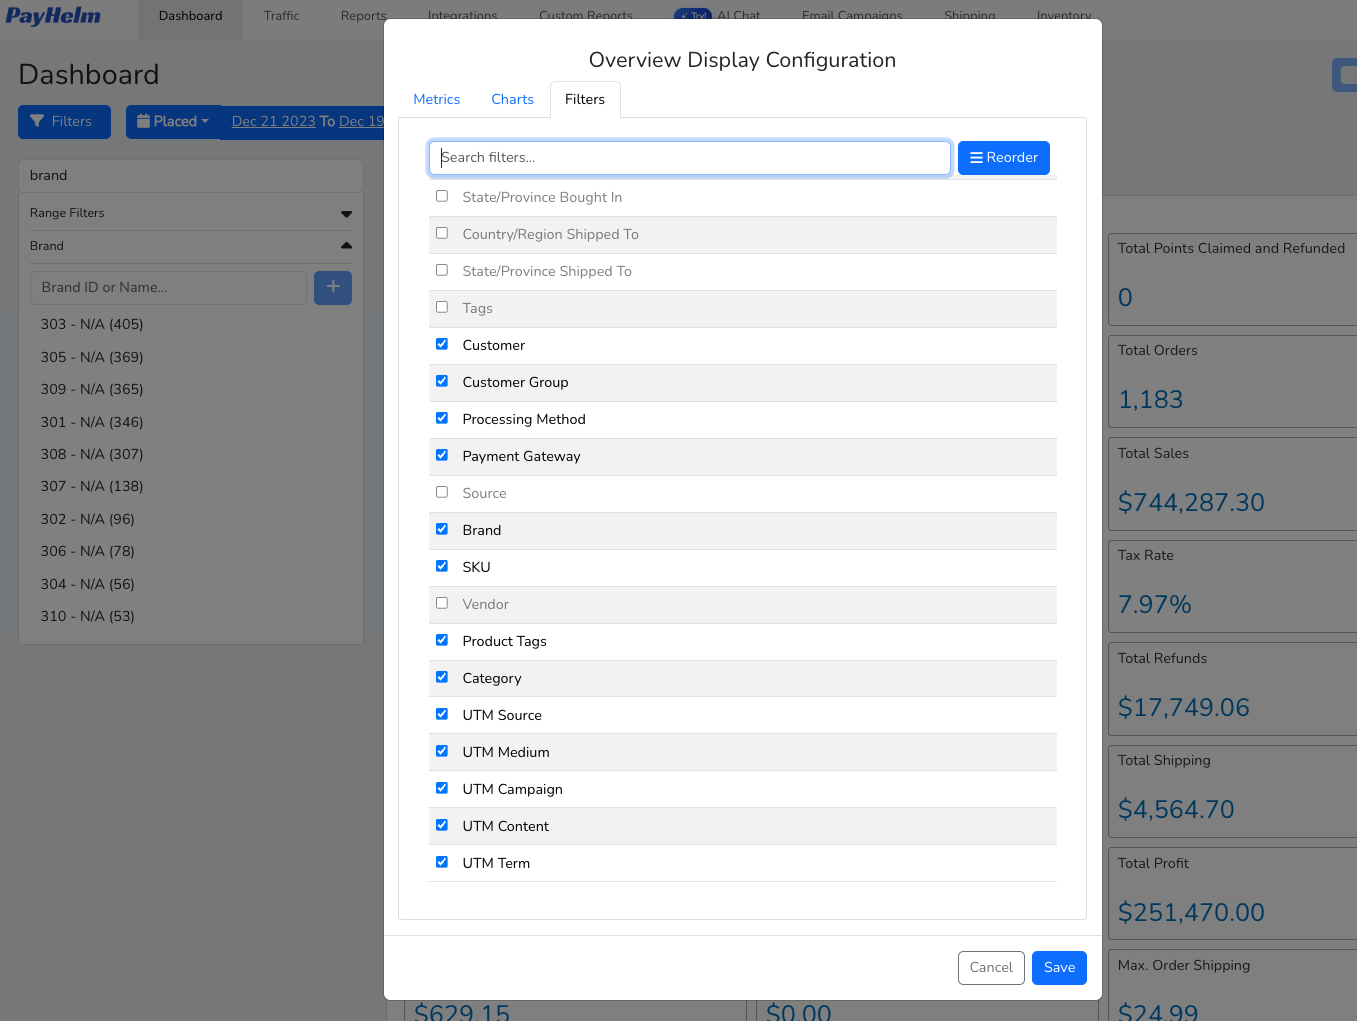
- On the Dashboard, click the gear icon to open the Overview Display Configuration modal.
- Click the Filters tab.
- Scroll through the list or use the Search filters box to find the filter you want — for example, Brand.
- Check the box next to it to enable it.
- Click Save.
Once saved, that filter type will appear in the Filters panel the next time you click the Filters button.
Frequently Asked Questions
Why can I not see the Brand filter in the Filters panel?
It may not be enabled. Click the gear icon on the Dashboard, go to the Filters tab in the Display Configuration modal, and make sure Brand is checked. Click Save and try again.
Can I filter by multiple Brand IDs at once?
Yes. In a report, click Add Filters again to add a second filter row. On the Dashboard, click the + button next to each brand you want to include.
I only see the Dashboard — where is the Reports section?
Reports is in the top navigation bar alongside Dashboard, Traffic, and Integrations. If you do not see it, your account role may have limited access. Contact your account administrator or reach out to support at success@payhelm.com.
Still Need Help?
Contact our support team at success@payhelm.com and we will be happy to walk you through filtering for your specific use case.
Related Articles
Custom Metric Builder
Build any KPI you need using PayHelm's Custom Metric Builder — combine revenue, orders, spend, and more into calculated metrics you can use across every report.
Understanding Dual Commission Reports: Commission vs Sales Tracking
Learn why PayHelm uses two separate commission reports and how each serves a distinct purpose in tracking commission payments versus sales performance for comprehensive sales team management.
Calculate Average Inventory Turns and Time on Shelf
Measure how quickly your inventory sells with inventory turnover metrics and time on shelf analysis to optimize purchasing and identify slow-moving products.
Automate with PayHelm AI
Let an AI agent handle these tasks for you — automatically, on a schedule.
Detect Discount Abuse in Campaign Audiences
Identify the customers training themselves to only buy at a discount.
Monitor Inventory Risk for Promoted or Seasonal Products
Make sure the products you're actively promoting are going to be in stock when customers arrive.
Optimize Amazon Product Titles, Bullets, and Backend Terms
Rank higher on Amazon A9 with AI-optimized listing content refreshed every week.
From the PayHelm Blog
Insights and guides to help you grow your ecommerce business.
7 Ecommerce Analytics Mistakes and How to Fix Them
Ecommerce analytics drive business decisions that determine success or failure in the digital marketplace. Yet countless businesses sabotage their growth potential through preventable mistakes that distort data accuracy and undermine strategic decision-making.
May Product Release: Elevating Your Experience
In May, we're sharing remarkable updates designed to take your user experience to the next level with pre-configured reports and seamless integrations.
Stop Wasting $1000s on Wrong Attribution: The Real-Time Ecommerce Reporting Guide
Every month, thousands of ecommerce businesses unknowingly throw money down the drain because their attribution models are broken. Learn how to fix your attribution and stop wasting ad spend.